Introduction
following on from my original blog ‘When “Shift‑Left” Leaves the Back Door Open: Why Governance Matters More Than Ever’ this is part 1 of a 3 part follow up series where ill discuss examples of tools and strategies I’ve used to implement some of the security considerations I outlined in the aforementioned post. In this post in particular ill be discussing the below aspects;
- Tooling
- Scanning Secrets
- Branch Policies
- Security Policies
App Security Platform tooling
There are many tools of choice for DevSecOps governance enforcement in Azure Dev Ops (ADO) but in this example i’m going to discuss Github Advanced Security (GHAS) as it covers the vast majority of the security requirements (Secret Scanning, SAST, SCA) and is super easy to implement.
As is the case with all these tools it does come at a cost (Github Advanced Security Pricing) and although its not the cheapest of the major players its one of the cheapest and the fact its natively built into ADO is a big tick. By the click of a button you can enable it (make sure you have at least Project Admin permissions) – at which point it immediately starts protecting your environment by scanning for old secrets and blocking new secrets and SAST and SCA scanning provide informational feedback on any discrepancies found in default or protected branches (I discuss SAST and SCA in more detail in part 2 blog).
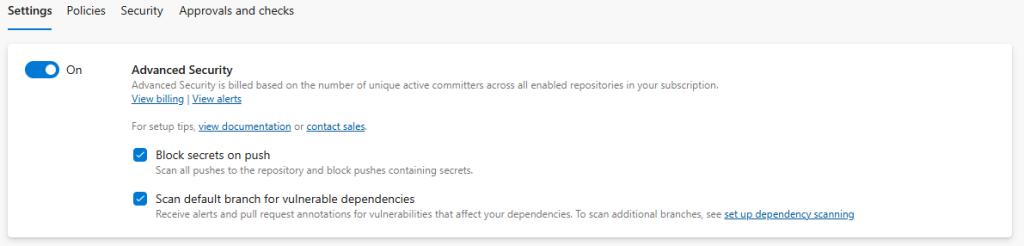
Enabling Github Advanced Security. Project > Repositories > Select Repo > Settings. Toggle the features you want turned on or off
Secret Scanning
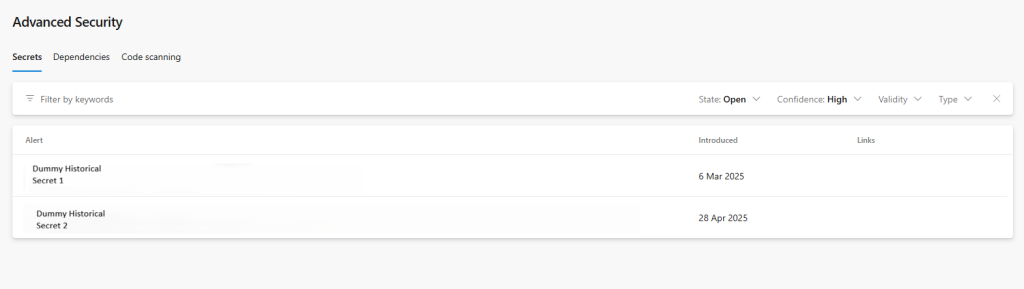
Once enabled, out of the box GHAS gets to work on scanning your code base for secrets. On initial enablement it scans for any historical secrets displaying any findings in the Advanced Secrets blade of any repositories with old secrets. In here you can review the secrets and decide to accept the risk or remediate them using various git commands – but this does require a history rewrite so take this into consideration when planning your branch policies (I discuss these later on)
Repos > Advanced Security > Change your Repo to view any secrets captured
Going forward GHAS also blocks new secrets from being pushed on Git push either forcing the developer to either justify or remove the secret before reattempting to commit.
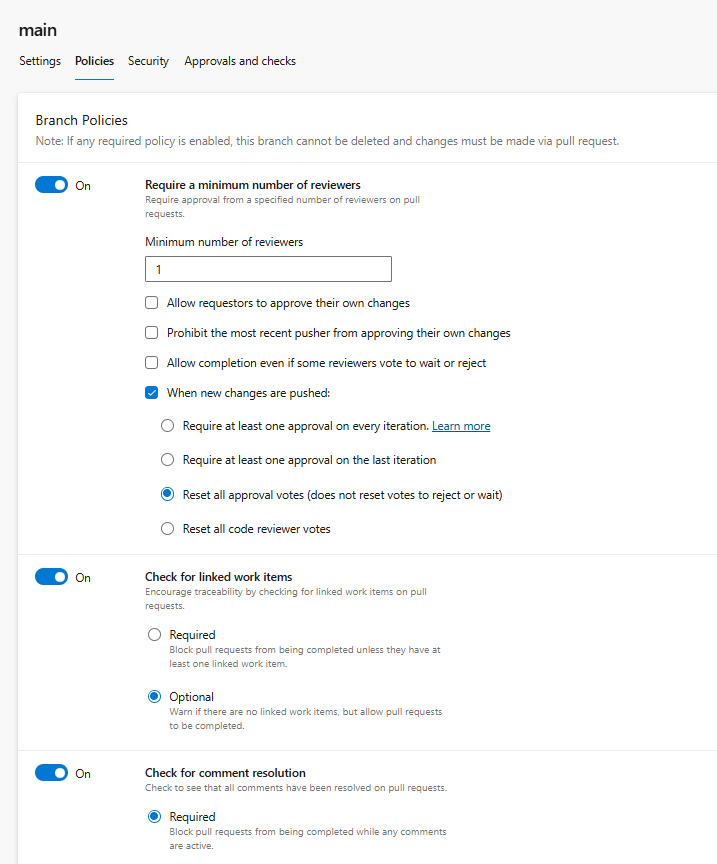
Branch Policies and Security Policies
Why is it important to protect your default and permanent branches? Without branch protection you open the door to introducing poor quality code into your precious branches. Branch policies can enforce thing such as:
- Minimum number of PR reviewers
- Required PR reviewers
- Merge type controls
- Pre Merge Build validations
- Force work items to be linked to commits
They are straightforward to implement – Repos > branches, click on the ellipsis and select branch policies
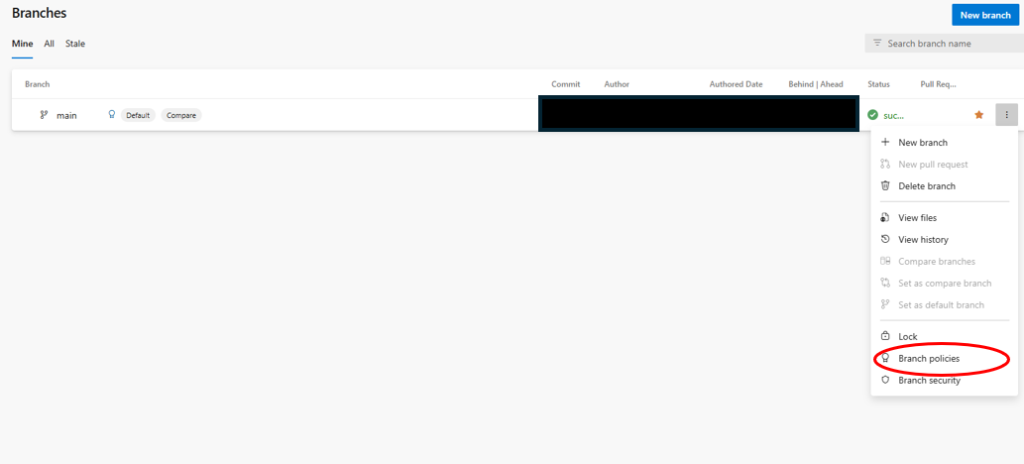
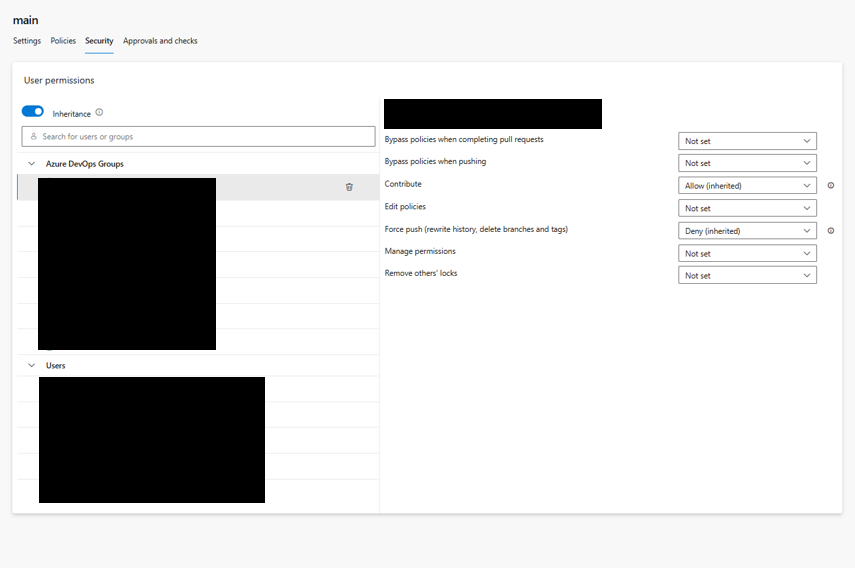
You can also find the Security policies in the same place on the Security tab. The are a number of options in here designed to protect your branches.
These permissions can be set to groups and or individual users at the project or repo level but you can override this inheritance by setting the inheritance radio button to off.
How you use these permissions will vary dependent upon the make up of your team and the nature of your governance requirements but I’ll explain some of the options below and how I’ve used them;
- Bypass policies when completing pull requests: this allows the group/user to complete a PR even if the PR merge checks violate branch policies.
- Bypass policies when pushing: Enables the group/user to commit directly to the branch despite the branch having branch policies set.
- Contribute: If enabled the group/user can push changes to the branch – if disabled, they cant push anything to it. Ive only ever enabled this for non developer groups/users
- Edit policies: Allows the group/user to edit branch policies. I enable for Project Admins only.
- Force push (rewrite history, delete branches). The group/user can rewrite commit history. They can also delete branches altogether. I usually set this to DENY for all members, however temporarily enable if required e.g. if the secret scanner reveals historical secrets committed that need removing.
- Manage permissions: The group/user can control branch permissions such as who can push or bypass policies, who can force push. I enable for Project Admins only.
Its also worth pointing out you can set each of the above options to 1 of 3 states;
- Allow: the group/user can do the thing
- Deny: The group/user cant do the thing
- Not Set: Neither allowed or denied doing the thing – but they will inherit what is set further up the hierarchy i.e. repo or project level
Pre-deployment Approvals
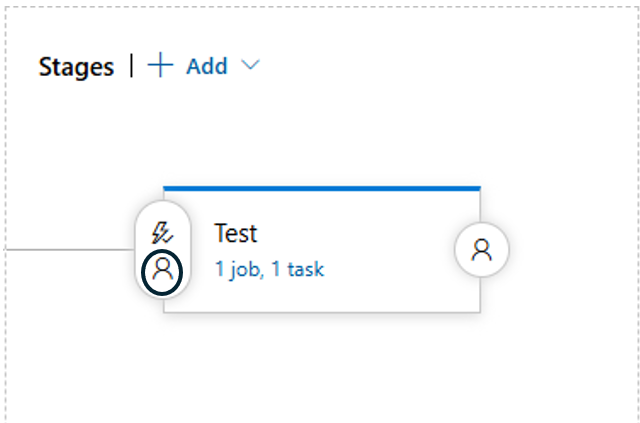
How do we prevent bad code being deployed to our environments accidentally or otherwise? This is where Pre-deployment Approvals come in. The allow us to appoint required users to ‘sign-off’ the deployment of code to any given environment. Unless the approver approves the deployment, the code can not be deployed. I usually reserve this type of intervention for UAT deployment stages and upwards.
They are pretty easy to implement in Release pipelines; Click on the little person icon on the stage (environment) you want to implement the pre-deployment approvals for, select your approver(s) from the drop down list, and set an expiration date by which they must be approved. Then on the next attempt to perform a deployment the approver will receive a notification that the need to review/approve a deployment.
Project > Pipelines > Release > Select your release stage and click Edit.
Now you select your approvers and save

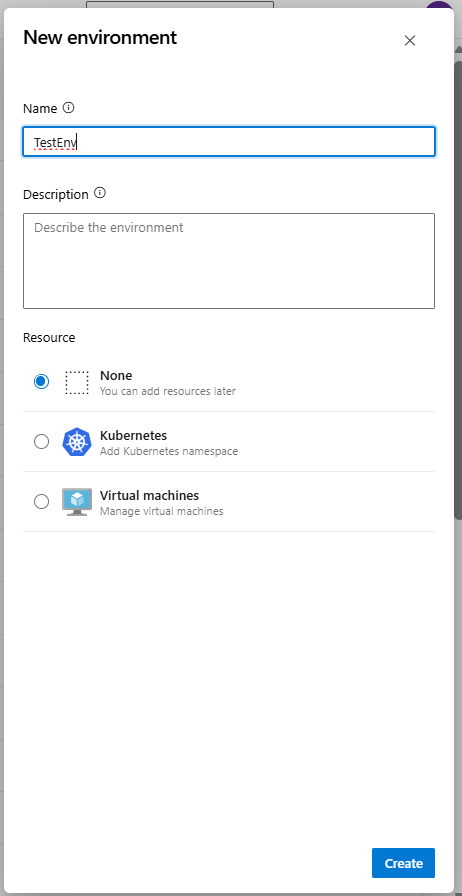
For yaml deployment pipelines there is a bit more work to do. You’ll need to select create an Environment for the stage you want to add the pre-deployment approvals to and then add your approvers within the environment. You’ll then need to bind this environment to the deployment stage in your pipeline as part of your yaml definition.
Creating a new Environment. Project > Pipelines > Environments> Create New Environment > Give it a name and leave other defaults.
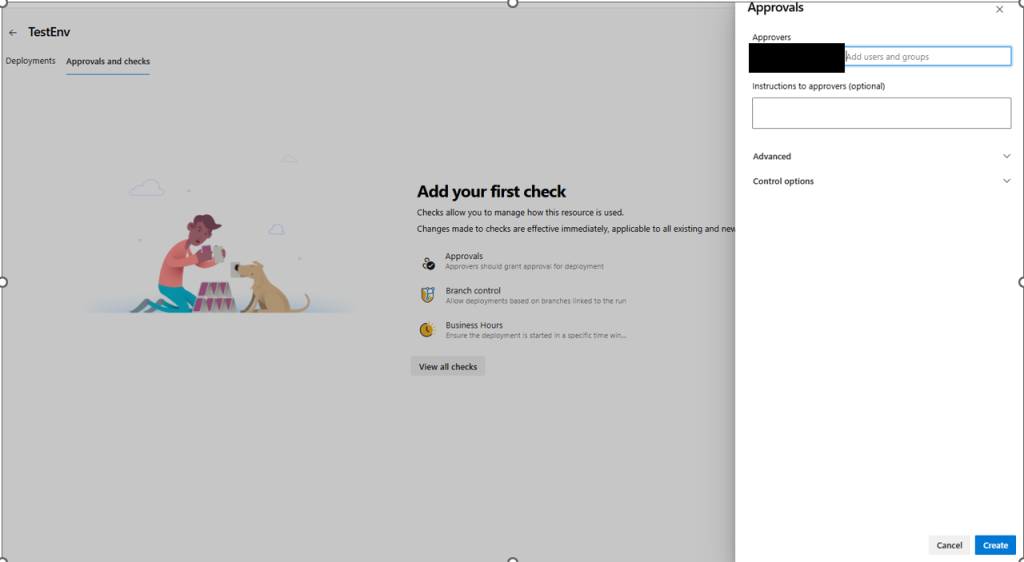
Now Click on your new Environment, Approvals and Checks > Approvals then add approvers from the list and click create
Now update your yaml pipeline and associate with the Environment/Approval Checks. When this pipeline is triggered the deployment will be blocked until the approver approves it.
Some dummy yaml code to illustrate binding your Environment to your yaml deployment
 - stage: DeployProd
    displayName: "Deploy to Prod"
    dependsOn: Another_Stage
    condition: eq(variables['Build.SourceBranch'], 'refs/heads/prod')

    jobs:
      - deployment: DeployProd
        environment: TestEnv //this should match the name of your new Environment to associate it
        strategy:
          runOnce:
            deploy:
              steps:
                - task: DummyDeploymentTask@0
                  displayName: Push to Prod
Summary
In summary ive discussed DevSecOps governance tooling in the shape of Github Advanced Security and how out of the box it scans for historical secrets provisioning a GUI to enable developers to remediate any findings. Going forward secrets will also be blocked on push (if enabled). SAST and SCA scanning also provides informational results on code quality and Open Source Software violations. Branch and Security policies can also be implemented to prevent poor code from being merged into permanent branches, rewriting commit history or deleting branches altogether. Pre-deployment Approvals can also be employed to block code from being deployed to your environments without oversight. I hope you find this helpful on your journey towards a shift-left mind set and in my next post ill talk about techniques to actively block builds through SAST and SCA scan findings.
Leave a Reply